Deploying a Multi-Container Voting Application on Kubernetes
12 Dec 2025
Introduction
After setting up my K3s cluster (see my previous post on K3s installation), I deployed my first real application: a distributed voting app with multiple microservices. This project demonstrates key Kubernetes concepts including deployments, services, persistent storage, and inter-container communication.
This wasn't just following a tutorial - I adapted a Docker Compose application to run on my home lab Kubernetes cluster, managing it remotely from my workstation. The complete code is available in my GitHub repository.
Application Architecture
The voting application consists of five microservices:
- Vote: Python web app where users cast votes
- Redis: In-memory database storing votes temporarily
- Worker: .NET service that processes votes from Redis
- DB: PostgreSQL database for permanent vote storage
- Result: Node.js web app displaying real-time results
Data Flow:
- User votes via the Vote frontend
- Vote stored in Redis
- Worker consumes from Redis and writes to PostgreSQL
- Result frontend queries PostgreSQL and displays results
Prerequisites
Before starting, ensure you have:
- K3s installed and running (see my previous post)
- kubectl configured for remote access
- Basic understanding of YAML syntax
- Git installed on your workstation
Project Setup
Step 1: Create Project Structure
On your workstation (not the server), create a project directory:
mkdir -p ~/projects/voting-app-k8s
cd ~/projects/voting-app-k8s
Step 2: Initialize Git Repository
Initialize Git from the start to maintain version control:
git init
Create the repository on GitHub (make it public for portfolio purposes), then connect your local repository:
git remote add origin https://YOUR-USERNAME@github.com/YOUR-USERNAME/voting-app-kubernetes.git
Important: Include your username in the URL (https://YOUR-USERNAME@github.com/...) to avoid authentication issues.
Creating Kubernetes Manifests
I created nine YAML files total: five deployments and four services. Let me walk through the key components.
Understanding Deployments vs Services
Before diving into the files, it's important to understand these two Kubernetes objects:
Deployments: Define how to run your containers
- What image to use
- How many replicas
- Resource limits
- Environment variables
Services: Define how to access your containers
- Provide stable IP addresses
- Enable service discovery
- Expose applications to the network
Step 3: Create a Namespace
Namespaces organize resources and prevent conflicts with other applications:
kubectl create namespace appvotacion
Verify it was created:
kubectl get namespaces
Step 4: Create the Database Deployment
Create db-deployment.yaml:
apiVersion: apps/v1
kind: Deployment
metadata:
  name: db
  namespace: appvotacion
spec:
  replicas: 1
  selector:
    matchLabels:
      app: db
  template:
    metadata:
      labels:
        app: db
    spec:
      containers:
      - name: db
        image: postgres:15-alpine
        env:
        - name: POSTGRES_USER
          value: "postgres"
        - name: POSTGRES_PASSWORD
          value: "postgres"
        ports:
        - containerPort: 5432
Key points:
- "replicas: 1" means one instance of this container
- "labels" help services find this deployment
- "env" variables configure PostgreSQL
Step 5: Create the Database Service
Create db-service.yaml:
apiVersion: v1
kind: Service
metadata:
  name: db
  namespace: appvotacion
spec:
  type: ClusterIP
  selector:
    app: db
  ports:
  - port: 5432
    targetPort: 5432
Key points:
- "ClusterIP" means this service is only accessible within the cluster
- "selector: app: db" connects to pods with that label
- Other containers can reach this as "db:5432"
Step 6: Create Redis Deployment and Service
Create redis-deployment.yaml:
apiVersion: apps/v1
kind: Deployment
metadata:
  name: redis
  namespace: appvotacion
spec:
  replicas: 1
  selector:
    matchLabels:
      app: redis
  template:
    metadata:
      labels:
        app: redis
    spec:
      containers:
      - name: redis
        image: redis:alpine
        ports:
        - containerPort: 6379
Create redis-service.yaml:
apiVersion: v1
kind: Service
metadata:
  name: redis
  namespace: appvotacion
spec:
  type: ClusterIP
  selector:
    app: redis
  ports:
  - port: 6379
    targetPort: 6379
Step 7: Create Worker Deployment
Create worker-deployment.yaml:
apiVersion: apps/v1
kind: Deployment
metadata:
  name: worker
  namespace: appvotacion
spec:
  replicas: 1
  selector:
    matchLabels:
      app: worker
  template:
    metadata:
      labels:
        app: worker
    spec:
      containers:
      - name: worker
        image: dockersamples/examplevotingapp_worker
Note: The worker doesn't need a service because nothing connects to it - it connects to Redis and PostgreSQL.
Step 8: Create Vote Frontend
Create vote-deployment.yaml:
apiVersion: apps/v1
kind: Deployment
metadata:
  name: vote
  namespace: appvotacion
spec:
  replicas: 1
  selector:
    matchLabels:
      app: vote
  template:
    metadata:
      labels:
        app: vote
    spec:
      containers:
      - name: vote
        image: dockersamples/examplevotingapp_vote
        ports:
        - containerPort: 80
Create vote-service.yaml:
apiVersion: v1
kind: Service
metadata:
  name: vote
  namespace: appvotacion
spec:
  type: NodePort
  selector:
    app: vote
  ports:
  - port: 80
    targetPort: 80
    nodePort: 31000
Key point: "NodePort" exposes this service outside the cluster at port 31000.
Step 9: Create Result Frontend
Create result-deployment.yaml:
apiVersion: apps/v1
kind: Deployment
metadata:
  name: result
  namespace: appvotacion
spec:
  replicas: 1
  selector:
    matchLabels:
      app: result
  template:
    metadata:
      labels:
        app: result
    spec:
      containers:
      - name: result
        image: dockersamples/examplevotingapp_result
        ports:
        - containerPort: 80
Create result-service.yaml:
apiVersion: v1
kind: Service
metadata:
  name: result
  namespace: appvotacion
spec:
  type: NodePort
  selector:
    app: result
  ports:
  - port: 80
    targetPort: 80
    nodePort: 31001
Deploying the Application
Step 10: Commit Your Work
Before deploying, commit your YAML files:
git add .
git commit -m "Add voting app Kubernetes manifests"
git push -u origin main
Step 11: Deploy All Resources
From your project directory, apply all YAML files at once:
kubectl apply -f . --namespace=appvotacion
This command applies every YAML file in the current directory to the "appvotacion" namespace.
Step 12: Verify Deployment
Check all resources were created:
kubectl get all -n appvotacion
You should see:
- 5 deployments
- 5 pods (one per deployment)
- 4 services
- 5 replicasets
Verify all pods are running:
kubectl get pods -n appvotacion
All pods should show "STATUS: Running" and "READY: 1/1".
Step 13: Check Pod Distribution
To see which node each pod is running on:
kubectl get pods -n appvotacion -o wide
The "NODE" column shows where each pod is running. Since I have a single-node cluster, all pods run on "master".
Accessing the Application
The voting and result services are exposed via NodePort, making them accessible from outside the cluster.
Access the applications in your browser:
- Voting interface:
http://YOUR-SERVER-IP:31000 - Results interface:
http://YOUR-SERVER-IP:31001

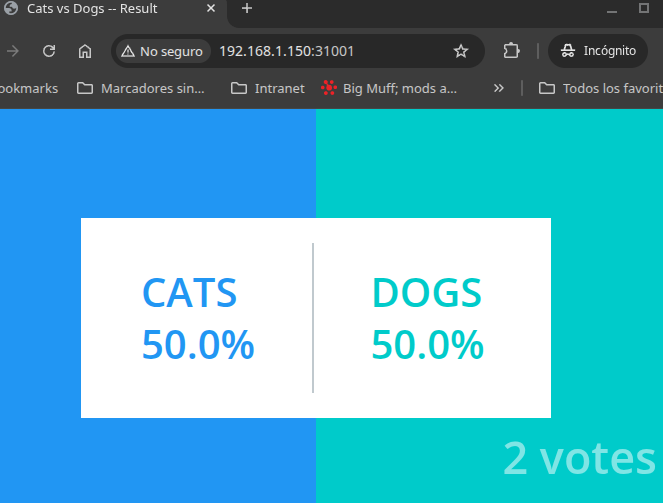 Test the application:
- Open the voting interface
- Cast a vote (cats or dogs)
- Open the results interface
- See your vote counted in real-time
Key Concepts Learned
Service Types
ClusterIP (db, redis):
- Only accessible within the cluster
- Other pods can reach it by service name
- Most secure option for internal services
NodePort (vote, result):
- Accessible from outside the cluster
- Exposes service on a specific port (31000, 31001)
- Good for development and home labs
LoadBalancer (not used here):
- Creates external load balancer
- Requires cloud provider or MetalLB
- Production-grade external access
Service Discovery
Kubernetes provides built-in DNS for service discovery. When the worker needs to connect to Redis, it simply uses the hostname "redis" - Kubernetes resolves this to the correct ClusterIP automatically.
This is why our services are named "db" and "redis" - these names become DNS entries within the cluster.
Applying Multiple Files
Using kubectl apply -f . is efficient for applying entire directories of manifests. However, you can also apply files individually:
kubectl apply -f db-deployment.yaml -n appvotacion
kubectl apply -f db-service.yaml -n appvotacion
Or specify files explicitly:
kubectl apply -f db-deployment.yaml -f db-service.yaml -n appvotacion
Namespace Usage
Setting the default namespace avoids typing "-n appvotacion" every time:
kubectl config set-context --current --namespace=appvotacion
After this, "kubectl get pods" automatically queries the "appvotacion" namespace.
Troubleshooting Common Issues
Pod Not Starting
Check pod status and events:
kubectl describe pod POD-NAME -n appvotacion
Look at the "Events" section for error messages.
Application Not Accessible
Verify the service was created:
kubectl get services -n appvotacion
Check that NodePort services show the correct ports (31000, 31001).
Container Logs
View logs from a specific pod:
kubectl logs POD-NAME -n appvotacion
Add "-f" to follow logs in real-time:
kubectl logs -f POD-NAME -n appvotacion
Cleaning Up
To remove the entire application:
kubectl delete namespace appvotacion
This deletes everything in the namespace: deployments, pods, services, and any other resources.
What I Learned
This project taught me several important Kubernetes concepts:
- Microservices Architecture: How multiple containers work together
- Service Discovery: How Kubernetes DNS enables inter-container communication
- Resource Organization: Using namespaces to isolate applications
- Declarative Configuration: Defining desired state in YAML files
- Service Types: When to use ClusterIP vs NodePort vs LoadBalancer
Next Steps
Future improvements I'm planning:
- Add persistent volumes for PostgreSQL data
- Implement resource limits for each container
- Add health checks (liveness and readiness probes)
- Use ConfigMaps for configuration instead of hardcoded values
- Implement Secrets for sensitive data like database passwords
- Scale the vote frontend with multiple replicas
- Add Ingress for proper external routing
Conclusion
Deploying this multi-container application demonstrated real-world Kubernetes usage beyond simple tutorials. I managed the entire workflow from my workstation - writing YAML files, committing to Git, and deploying to my home lab cluster.
This hands-on experience with deployments, services, and namespaces provides a foundation for more complex projects. All code is available in my GitHub repository for reference.