Building My Home Lab: From a $49 Mini PC to a Full Learning Environment
27 Nov 2025
Introduction
Every DevOps engineer needs a playground. A place to break things, learn, and experiment without consequences. That's why I built my home lab.
I didn't need anything fancy or expensive. I just needed real hardware running real services so I could practice with actual infrastructure, not just virtual machines on my laptop.
This post covers how I set up my home lab from scratch using a used HP EliteDesk mini PC I bought on eBay for 49€. It's not glamorous, but it works, and more importantly, it's teaching me exactly what I need to know.
Why a Physical Home Lab?
Before we dive into the setup, let me explain why I chose physical hardware over cloud-only learning.
Learning by doing: Running services on real hardware teaches you things that cloud consoles hide from you. How do disks actually mount? What happens when you mess up network configuration? How do you troubleshoot when you can't just spin up a new instance?
Cost control: Cloud resources cost money when they're running. My mini PC costs me electricity and nothing else. I can leave it running 24/7 without worrying about surprise bills.
Real-world skills: In many companies, especially smaller ones or on-premise environments, you'll work with physical servers. Understanding hardware, BIOS, physical storage, and actual networking matters.
Dual purpose: My home lab serves both as a learning environment for DevOps projects and as useful infrastructure for my family. Services like Jellyfin, Nextcloud, and Immich run here serving real purposes while teaching me container orchestration and system administration.
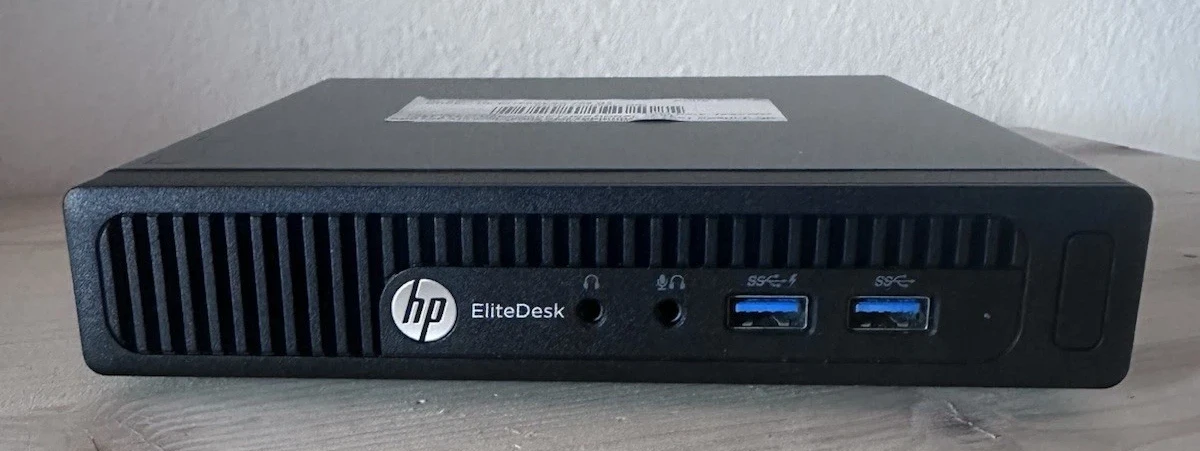
The Hardware: HP EliteDesk 800 G2 Mini
Specifications:
- CPU: AMD A9-9700 (dual-core)
- RAM: Started with 4GB, upgraded to 18GB DDR4
- Storage: 128GB SSD (system), plus additional HDDs for data
- Cost: 49€ on eBay (used)
Why this specific model?
Honestly, because it was cheap and available. Mini PCs are perfect for home labs because they're:
- Small and quiet
- Low power consumption
- Cheap on the used market
- Powerful enough for containerized services
The A9-9700 isn't going to win any performance awards, but for running containers and learning Kubernetes, it's more than sufficient.
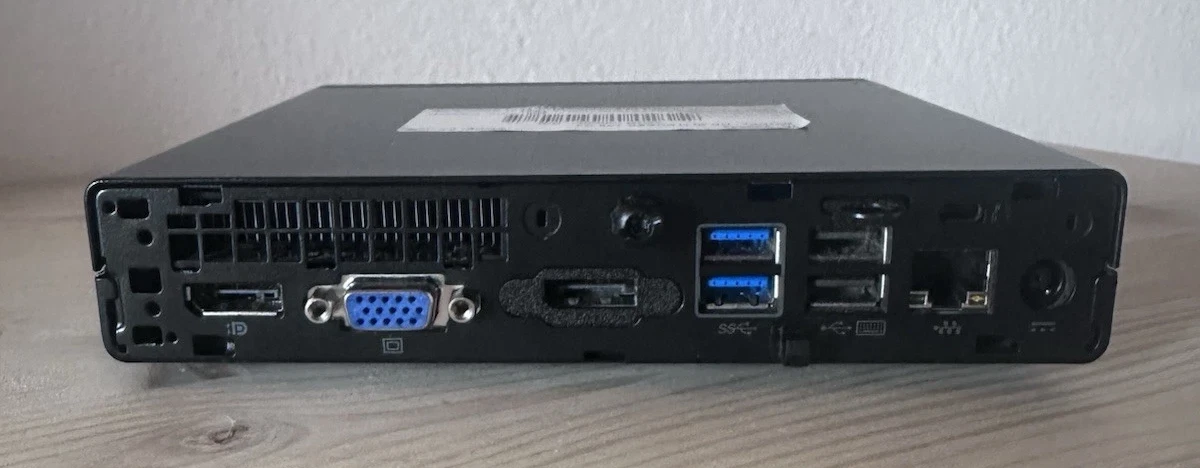
The Challenge: No Monitor Compatibility
The HP EliteDesk only has VGA and DisplayPort outputs. I don't have monitors with these connections.
Problem: How do you install an operating system on a server with no way to see what you're doing?
Solution: External installation.
I removed the SSD from the mini PC, connected it to my laptop using a SATA-to-USB adapter, and installed Ubuntu Server directly onto the drive. Once configured, I put the SSD back in the mini PC and booted it up.
This approach meant I could:
- See the installation process on my laptop
- Configure networking ahead of time
- Enable SSH from the start
- Never need a monitor again
Choosing the Operating System
I love Debian Server, but this was old hardware and I was concerned about driver support. Ubuntu Server has broader hardware compatibility and better out-of-box support for older components.
Decision: Ubuntu Server 24.04 LTS
The LTS (Long Term Support) version means five years of security updates and stability, which is exactly what you want for a home server.
Installation Process: Step by Step
Here's what I did, in chronological order.
Step 1: Prepare the Installation Media
On my laptop:
Downloaded Ubuntu Server 24.04 LTS ISO from the official website.
Created a bootable USB drive:
sudo dd if=ubuntu-24.04-server.iso of=/dev/sdX bs=4M status=progress
Replace /dev/sdX with your USB drive identifier (use lsblk to find it).
Step 2: Connect the SSD Externally
Removed the SSD from the mini PC and connected it to my laptop via SATA-to-USB adapter.
Verified the drive was detected:
lsblk
The SSD appeared as /dev/sdb (or similar).
Step 3: Install Ubuntu Server
Booted my laptop from the USB drive and started the Ubuntu Server installer.
Key installation choices:
Target disk: Selected the external SSD (/dev/sdb)
Network configuration: Configured basic networking (DHCP for now, would switch to static later)
Profile setup: Created my user account
SSH setup: Enabled OpenSSH server during installation (critical for headless operation)
Featured server snaps: Selected Docker installation
The installation completed and I shut down my laptop without removing the USB drive yet.
Step 4: Initial Boot and Configuration
Disconnected the SSD from my laptop, reinstalled it in the mini PC, and powered it on.
First verification: Logged in via console to confirm the system booted correctly.
Second verification: Found the server's IP address by checking my router's DHCP leases.
Third verification: SSH from my laptop:
ssh username@server-ip
Success. I was in.
Step 5: Configure Static IP Address
DHCP works but isn't reliable for servers. I needed a static IP address.
Edit netplan configuration:
sudo nano /etc/netplan/00-installer-config.yaml
Configuration:
network:
  version: 2
  ethernets:
    enp1s0:
      addresses:
        - 192.168.1.100/24
      routes:
        - to: default
          via: 192.168.1.1
      nameservers:
        addresses:
          - 8.8.8.8
          - 8.8.4.4
Replace the interface name (enp1s0) and IP addresses with your network configuration.
Apply changes:
sudo netplan apply
Test the connection:
ping 8.8.8.8
Static IP configured successfully.
Step 6: Fix Docker Installation
The Docker installation from the Ubuntu installer was incomplete. I needed to install it properly.
Remove incomplete installation:
sudo apt remove docker docker-engine docker.io containerd runc
Install Docker from official repository:
# Update package index
sudo apt update

# Install dependencies
sudo apt install apt-transport-https ca-certificates curl software-properties-common

# Add Docker's GPG key
curl -fsSL https://download.docker.com/linux/ubuntu/gpg | sudo gpg --dearmor -o /usr/share/keyrings/docker-archive-keyring.gpg

# Add Docker repository
echo "deb [arch=amd64 signed-by=/usr/share/keyrings/docker-archive-keyring.gpg] https://download.docker.com/linux/ubuntu $(lsb_release -cs) stable" | sudo tee /etc/apt/sources.list.d/docker.list > /dev/null

# Install Docker
sudo apt update
sudo apt install docker-ce docker-ce-cli containerd.io
Verify installation:
sudo docker --version
sudo docker run hello-world
Step 7: Configure Docker Permissions
By default, Docker requires sudo for every command. This is annoying for daily use.
Add user to docker group:
sudo usermod -aG docker $USER
Apply group changes (log out and back in, or run):
newgrp docker
Test without sudo:
docker ps
Step 8: Install Docker Compose
Docker Compose manages multi-container applications with simple YAML files.
Install Docker Compose:
sudo apt install docker-compose-plugin
Verify installation:
docker compose version
Step 9: Install Portainer
Portainer provides a web interface for managing Docker containers. While I prefer command-line management, Portainer is useful for quick visualization and family members who might need to restart services.
Create directory structure:
mkdir -p ~/portainer
cd ~/portainer
Create docker-compose.yml:
version: '3'
services:
  portainer:
    image: portainer/portainer-ce:latest
    container_name: portainer
    restart: always
    ports:
      - "9000:9000"
    volumes:
      - /var/run/docker.sock:/var/run/docker.sock
      - portainer_data:/data

volumes:
  portainer_data:
Start Portainer:
docker compose up -d
Access Portainer:
Open browser and navigate to:
http://192.168.1.100:9000
Created admin account and logged in. Portainer was running.
Adding Storage: Mounting Additional Disks
The mini PC had space for additional drives. I added:
- 1TB HDD for media storage
- 500GB HDD for backups
Step 10: Identify Disks
List all block devices:
lsblk
Get disk UUIDs:
sudo blkid
Noted the UUIDs for the new disks (you'll need these for /etc/fstab).
Step 11: Create Mount Points
sudo mkdir -p /mnt/media
sudo mkdir -p /mnt/backups
Step 12: Format Disks (if needed)
If the disks were unformatted:
sudo mkfs.ext4 /dev/sdb1
sudo mkfs.ext4 /dev/sdc1
Replace /dev/sdb1 and /dev/sdc1 with your actual disk identifiers.
Step 13: Configure Automatic Mounting
Edit /etc/fstab:
sudo nano /etc/fstab
Add entries for each disk:
UUID=your-uuid-here  /mnt/media    ext4  defaults  0  2
UUID=your-uuid-here  /mnt/backups  ext4  defaults  0  2
Replace your-uuid-here with the actual UUIDs from blkid.
Test the configuration:
sudo mount -a
Verify mounts:
df -h
Both disks should appear mounted at /mnt/media and /mnt/backups.
Step 14: Fix Permissions
The mount points were owned by root. I needed my user to access them.
Change ownership:
sudo chown -R $USER:$USER /mnt/media
sudo chown -R $USER:$USER /mnt/backups
Set appropriate permissions:
sudo chmod -R 755 /mnt/media
sudo chmod -R 755 /mnt/backups
What's Running Now
My home lab currently hosts:
- Portainer: Container management interface
- Jellyfin: Media server for family movies and shows
- Nextcloud: Self-hosted file storage and sync
- Immich: Photo management and backup
But more importantly, it's my learning environment for:
- Docker container orchestration
- Linux system administration
- Networking and firewall configuration
- Backup strategies
- And soon, Kubernetes
Lessons Learned
Hardware limitations force creativity: Not having the right monitor cables taught me external installation methods that are actually useful skills.
Documentation matters: Every configuration step I documented here saved me hours when I needed to troubleshoot later.
Start simple: I didn't need enterprise-grade hardware. A $49 mini PC teaches the same concepts as a $500 server.
Iterate and improve: My setup isn't perfect. I'll add redundancy, better backups, and monitoring as I learn more.
What's Next
Future improvements I'm planning:
- Kubernetes cluster: Convert this single node into a K3s cluster
- Monitoring: Add Prometheus and Grafana for system monitoring
- Automated backups: Implement proper backup strategies with retention policies
- Reverse proxy: Set up Traefik or Nginx Proxy Manager for easier service access
- VPN access: Configure WireGuard for secure remote access
Each of these will be documented here as I implement them.
Why This Matters for DevOps
Building a home lab taught me skills that are harder to learn in cloud environments:
- Physical hardware troubleshooting: What do you do when a disk fails?
- Boot processes and BIOS: How does a system actually start?
- Storage management: Understanding filesystems, mounting, and permissions
- Network configuration: Setting up static IPs, understanding routing
- Service persistence: Making sure services start automatically after reboots
These fundamentals make you a better DevOps engineer, even if you're working primarily in the cloud.
Conclusion
For less than 60€ total (mini PC plus SATA adapter), I built a learning environment that serves both practical family needs and my DevOps education.
This isn't the fastest server, or the most elegant setup, but it's real infrastructure that I can experiment with, break, and rebuild. That hands-on experience is invaluable.
If you're learning DevOps, I highly recommend building your own home lab. You don't need expensive equipment. You need hardware that forces you to solve problems and teaches you how systems actually work.
All my projects, including the configurations for this home lab, are available on my GitHub.
Resources
- Ubuntu Server Documentation
- Docker Documentation
- Docker Compose Documentation
- Portainer Documentation
- r/homelab - Active community of home lab enthusiasts